All posts by Me

New Zealand

Hold it together, man

One thing that has always intrigued me (ok, perhaps not always, as puddles and sand castles intrigued me more as a kid – but at least since I started thinking about vehicle construction) is how metal can be bonded together and still maintain enough strength for the riguors of driving?

Aluminium in particular: Is aluminum bonding something I can do in my own garage, using basic tools, at low cost? Knowing basically nothing about bonding anything heavier than paper, where do I even start looking for the right adhesives and the correct technique?

It all got just a little easier today when I came across the adhesives toolkit – not only does it contain details of how different adhesives perform under different loads and stresses, but has nifty tools (as questionnaires) to help you find the perfect adhesive for your particular situation.

So what to use for a bonded aluminum chassis? Apparently something called Anaerobic Acrylic. What that is? I have no idea…

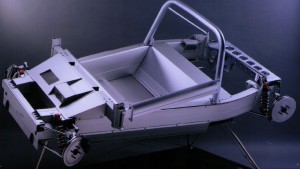
Lotus Elise aluminium chassis

The bonded aluminium chassis of the 1995 lotus Elise

Footnote: After some additional googling, TA4300 looks ideal.
Star Trekking

Star trekking across the universe
Only going forward ’cause we can’t find reverse

Scratch-built and kit cars based on motorcycle power-plants have long suffered from this Star Trekking ailment. No reverse gear to be found.

Some vehicles utilise a separate gearbox for reverse, or sometimes an electric motor for that purpose.  Others, such as the Peel 50 and the Isetta, had no reverse gear at all, so you had to have a mate handy to push you out of the garage or parking space.

I recently came across a small motorcycle engine (250cc) that has a reverse gear built directly in to the transmission.  This may seem slightly illogical – you’d have to be some sort of stunt devil to ride a motorcycle backwards – until you discover that the engine is meant for an ATV.  Doing some further research proved that this same manufacturer (Lifan, a large and very well known brand in China) has a score of engines with reverse gears.

In the interest of maintaining a list of motorcycle engines with reverse gears, here is the start of my list:

Suggestions to add to the list welcome!

Cirbin V13R reverse trike

Campagna V13R reverse trike
Harley Davidson powered 1250cc V-twin. With mechanical reverse gearbox 🙂

Bagus Completus

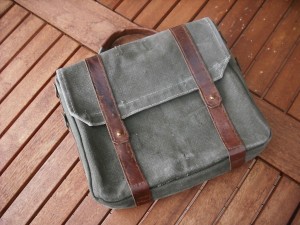
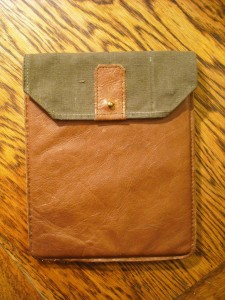
Finally, after several weeks of sporadic needle work, the iPad bag is finally complete.

Well, sort of.  The carry strap is still not quite done, but I want to mark a project ‘complete’ so bad that I’m going to ignore that little discrepancy.

The bag took a little longer than expected, as once the leather straps had been sewn around the outside of the bag I realised that they didn’t line up. This required some expletives, followed by un-stitching and restitching of part of the straps.

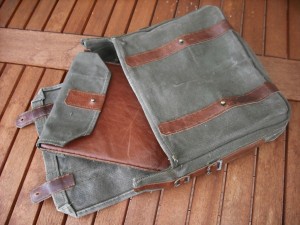
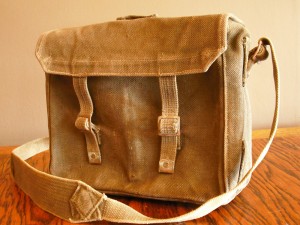
I now own a matching set of carry bag and iPad sleeve made from an ex-WWII haversack, and leather offcuts left over from furniture making.  The bag is much smaller and lighter than a laptop bag, but big enough to hold the iPad, charger,cables, dock, livescribe notepad and pen and various other items I require for business travel.

Bag Complete

Matching Set

Sleevus Completus

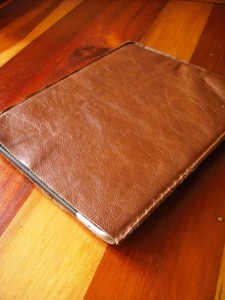
Following a delivery from Birdsall leather & craft in Australia I was finally able to finish the iPad sleeve.  My wife was gob-smacked that I had actually completed something, which was probably the best part of this project.  I just didn’t tell her that the sleeve was done, but the bag was nowhere near finished yet 🙂

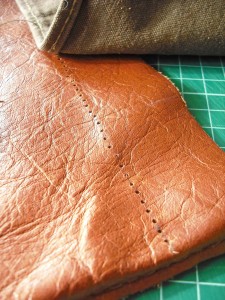
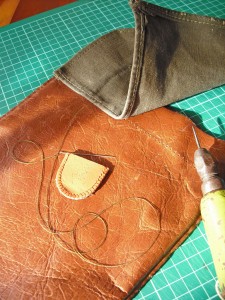
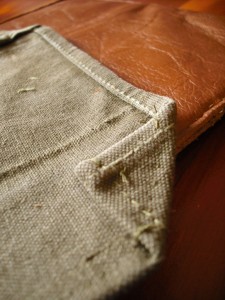
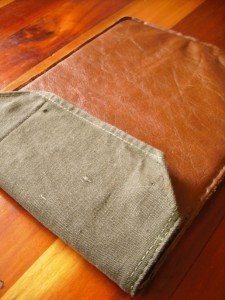
The canvas flap (made from left-over canvas from the ex-WWII haversack) was already hemmed, and the corners sewn over.  The next step was to attach this to the leather sleeve.  Once that was done the final step was to use a leather scrap as the anchor for the harness post to close the bag.

Sleevus Completus!

Flap stitch detail

Flap in progress

Sleeve complete

Detail of completed sleeve

Brownsleeves

While I am waiting for some hardware to turn up in order to complete the carry bag, I have been working on a leather sleeve for my new Apple iPad.  The intention is that the iPad lives in the sleeve, which is in turn carried in the bag.

I started by selecting two pieces of leather and tracing the shape of the iPad on to these, adding a 5mm seam margin on one, and a 10mm seam on the other.  The smaller piece sits against the screen of the iPad, and the larger piece follows the curved contour of the iPad back, hence it needs to be somewhat larger.  I didn’t happen to capture any images of this stage – sorry.

The next step was to use some strong waxed linen thread and a sharp leather awl to double-needle stitch the two pieces together using two needles at once.  Start from the open end on each side and stitch down to the bottom corners first.  Then insert the iPad and use it as a former (carefully!) when stitching the bottom seam.  You’ll need to stretch the leather over the curved shape of the iPad to get a good fit.

I then hemmed the edges of a piece of left over canvas from the WWII bag to use as a flap.  The corners of the flap are also folded and stitched over.  Once again by hand because my sewing machine skills are non-existent.  When I get some time I will attach the flap to the sleeve – but another project has come up in the meantime…

Leather iPad sleeve

Canvas flap for iPad sleeve

Canvas flap shown in place

Stitched

With the bag in pieces, the first step is to join it back together again. I employed a great tool here that I highly suggest everyone make use of (if you have access to it) – your mother. My mum is much handier with a sewing machine than I, and we just happened to be visiting 🙂

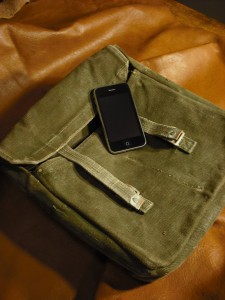
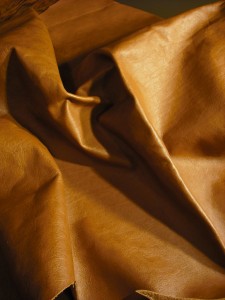
Here is the bag mostly stitched back together, with an iPhone for size comparison. My iPad turns up tomorrow, so I better get a move-on!  Shown with a beautiful piece of Andrew Muirhead Scottish leather found on TradeMe.  Just the flaps left to finish by hand before attaching leather and straps.

Stitched back together about 5cm thinner than previously

Fine Andrew Muirhead Scottish leather

Unstitched

On the mission to make the perfect iPad bag there may be no compromise.  Or something like that.  So instead of just adding leather to the ex-WWII haversack as it is (the easy way), I just had to make it narrower first (the hard way).

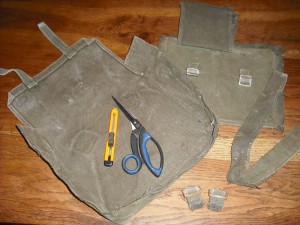
A lot of unpicking later, quick whip around with the scissors, and the bag is ready to be stitched back together again.

This bag is designed to replace my current bulky laptop and laptop bag that I currently use for business.  It will carry my iPad, iPhone, Livescribe pen and pad, business cards, and perhaps a few other sundry items.

Bag unstitched and narrowed by several cm

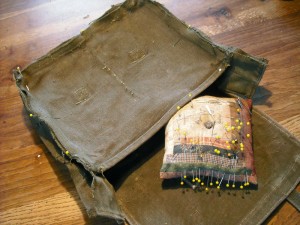
Front pinned back in place

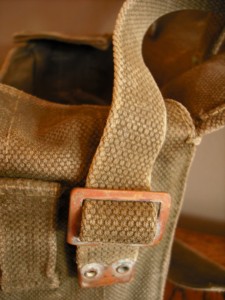
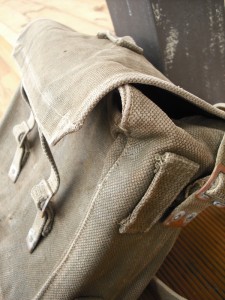
37 pattern webbing

My laptop weighs half a ton.  Because the battery only lasts 2 hours, whenever I travel the charger needs to come along for the ride, which weighs another 100kg.  The bulk of the two means I need a whopping great laptop bag, which weights an arm and a leg. The end result is like travelling with an elephant.

So I have ordered an iPad.

Of course, the iPad is a magical device, and so requires an equally magical bag to carry it in.  One a lot smaller than the old laptop bag.

The bags from temple bags are amazing, so I looked around on TradeMe for a bag the right size and with the right look to re-purpose into my own iPad-carrying creation.  I found a British ex-WWII pack designed in 1937 that will make the perfect base (’37 pattern webbing small pack, or haversack).

bag1

bag2

bag3

The stripper incident

On a recommendation from a friend, I hired a stripper.  A cheap stripper.

Now, you would think that a cheap stripper would do a nasty job, but this one had no problem steaming up the windows.  Even the wife was impressed.  She had a go herself.

I am, of course, talking about a wallpaper steamer/stripper.  At first we spent way too much time fruitlessly scratching at the wallpaper removing tiny scrap by tiny scrap.  The steamer, on the other hand, made amazingly quick work of the job.  Next time there will be no hesitation – $28 well spent.

The stripper at work

I often wonder about fashion.  What is fashionable now will look dated in a few years, appalling in 10, hilarious in 20, and be right back in fashion again in 30.  At least for those of us that don’t have vivid memories of it – Remember the 80’s anyone?

Paying homage to fashion over the ages are the various layers of wallpaper lovingly applied over the decades, and brutally removed by me:

Ok, paint, not really wallpaper. Dated

Decades old, hilarious!

The original. Actually, not bad!

Pasquali Riscio electric

Electricity has it’s attractions.  Electric motors output maximum torque from 1 RPM, so you get maximum power from the get go.  This means acceleration off the mark, even if the vehicle doesn’t have a super top speed (well, not all are slow).  Electricity can be produced cleanly, especially in New Zealand, where hydro power is our major electricity source, and wind turbines surround the city in which I live.  Electric motors are also extremely quiet, and produce no pollutants.

Unfortunately, electricity also has it’s drawbacks.  Range is a big one, especially in New Zealand where population density and terrain mean things tend to be far apart.  Charging a battery also takes slightly longer than filling your average fuel tank.

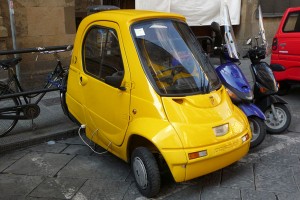
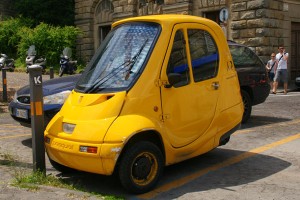
However, sometime it just makes sense.  Take the Italian Pasquali Risció as an example.  A shade over 1m x 2m and only 1.5m tall, one- or two-seater options, 40km/h top speed and a 50km range. Considering it’s meant for urban commuting, this is quite ideal.  Even the 8hr (ouch!) recharge time isn’t too bad if you can just plug it in over night.

My own project won’t be designed to run on electricity per se, but since it will be designed in such a way as to allow a wide range of power options I can’t rule out someone else being crazy enough to try it in the future.

Pasquali Riscio

Pasquali Riscio

Images sources: Lucarelli and Mallady.