I’m not one to learn from people’s past mistakes – I like to make them myself. A lot of them it seems.
The next step, after three hours of mindless drilling, was to cut a zillion spacers out of waste MDF, all exactly the same size. I cut them around 75mm square (from 18mm MDF). These were glued edge-wise all around the inner circumference of a former, and another former glued on top. Lining the formers up accurately was done by gluing the spacer against one of the pencil lines (mentioned in the last post) on one former, and then lining the next former up with the same pencil line.
Once all formers were glued together using the spacers I had my finished form, exactly 300mm wide, ready for lamination to begin. Mental note: It weighs a ton.
After talking to not enough people, I chose an expensive PVA-style glue called ‘Titebond III’ that is apparently the ducks nuts. It really is – it can stick anything together, and really fast – unfortunately, when you are laminating you need a lot of working time to get things right, and this glue does not give you that. Mental note: Next time choose a glue with an open time of 30 minutes at least. Titebond III has an open time of 10 minutes, but I swear that the glue became unworkable after 5.
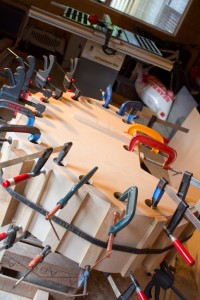
The first lamination consisted of a 4mm birch 4-ply sheet for the outer layer (also called aircraft ply, or thin birch ply), and a 6mm sheet of bendy ply (also 4-ply). Glue was spread over the birch ply (Mental note: Use lots more glue next time, and maybe don’t use a roller because it seems to eat the glue) and the birch ply was laid over the bendy ply. Using Father as a helper, we clamped both sheets in the centre (luckily we had marked the centre of the sheets and the centre of the former) and proceeded to clamp outward one way, and then the other way. This took close to 30 minutes with 2 people. Mental note: Clamping laminations is not as easy as I thought it would be!
One of the problems encountered early on is that it is very difficult to ensure that the two sheets are tightly mated. Especially in tight corners, the laminations come apart and a tiny gap forms. Because part of the work has already been clamped ahead, it is almost impossible to fix this before the glue goes off. I fixed the worst bits later by unclamping the work and squeezing glue down the gaps (bending the ply against the curve to open up the gap), pushing it down with a scrap of plastic cut off an ice cream container, and clamping it back up.
Once all clamps were on, we had the brainwave to strap a strop right around the whole thing and tighten it up. Genius! For the following laminations I used strops as the main clamping device, with a few clamps mostly just for positioning. This is only possible because my form is almost entirely convex. I would say both methods take about the same amount of time, but using the strops is easier for one person to handle.
Here is a photo showing the first laminations clamped in place and gluing well. Note the strop that we added later to help with the laminations coming apart. Also note the beer crates – great for round the shed.
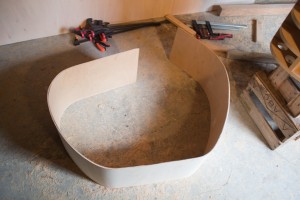
Once the work was unclamped, it sprung back about 100mm at each end, but is flexible enough to move back in to place with very little effort. This was much less spring-back than I was expecting from only the first two laminations.
Another layer of bendy-ply to go, followed by the final layer of birch ply!

