Category Archives: Poptop trailer caravan

Poptop trailer caravan. I say: Renovate! Wife says: … *surprisingly*… ok!

Caravan fun

I haven’t posted in a while – mostly because I’ve been busy on all my other projects – so here is a very quick update of progress with some pictures 🙂

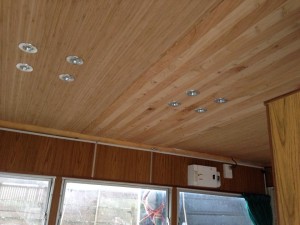
First job was installing the roof.  Carbonised bamboo on either side, with a panel of Lawson Cypress in the middle and remote-controlled 12v LED down lights.
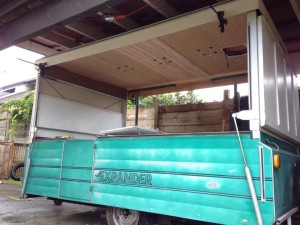
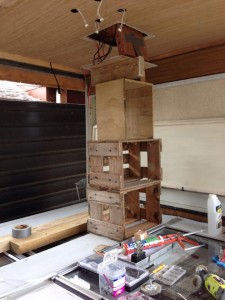
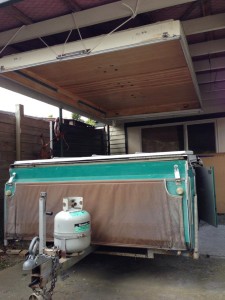
Roof raised ready for work on ceiling
Working on the electrics for the downlights
New ceiling is in!
New ceiling is in!
Roof raised under carport to work on ceiling

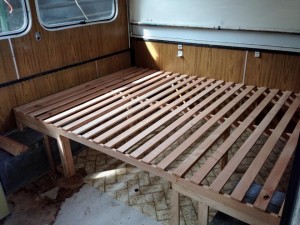
After a few camping trips, Wife and I were ready for a better bed. We decided to put in a a permanent (almost) full-size double bed to replace the folding table and squabs.  The mattress was made to order by a local bed manufacturer and is only 3cm shorter and the same width as a full double.  We also removed the wardrobe to get extra room for the bed.

The bed folds upwards to allow access to all the storage room underneath.

The kitchen was removed because we never used it and we always cook in the awning.  This allowed room for the bed, too, and I’m making new cabinets to fit the smaller space.
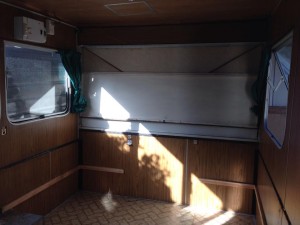
Out with the old table and bed
Half-way through making the new bed

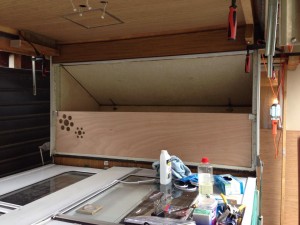
The next job were a few interior modifications. I added a shelf at one end for baskets (clothes etc) that folds up against the wall. We’re removing the wardrobe, so we need extra storage. Another shelf is planned for the other end, but hasn’t been done yet.  Also added a side for one of the beds – our girl was only 1yr old at this stage and we didn’t want her falling out!
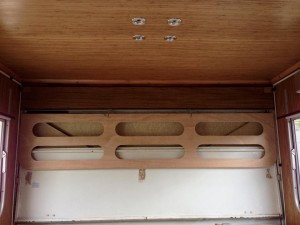
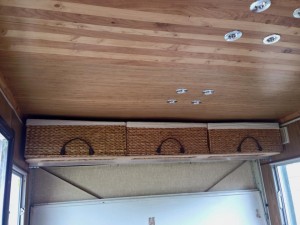
Folding shelf - up
Folding shelf – up
Folding shelf - down, with baskets
Folding shelf – down, with baskets
Side on bed for baby

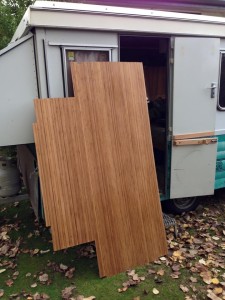
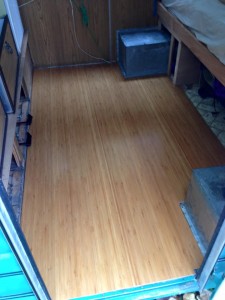
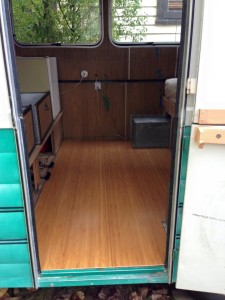
Next up was a new floor to match the ceiling.  The old lino floor looked pretty horrible compared to the ceiling!
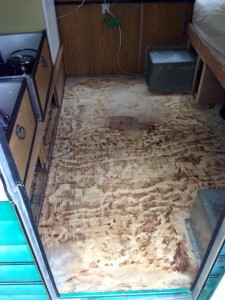
Out with the old floor
New floor cut to shape
New floor glued down
New floor finished
New floor finished

Currently I’m building the new cabinets to replace the kitchen that was removed (kept the fridge) and prepping the interior for painting!
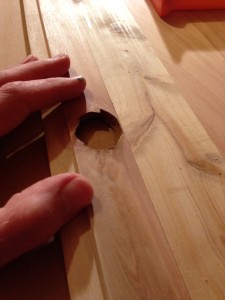
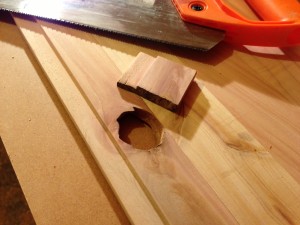


Repairing a loose knot

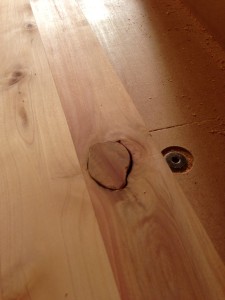
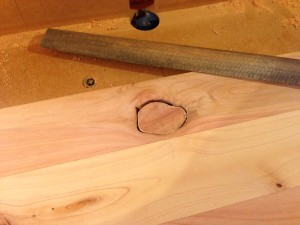
Unfortunately the thicknesser knocked a large knot right out of the timber. The hole is not just unsightly, but may let water and dust enter the caravan from the ceiling space.
Large knot missing

Rather than try to fill the hole with bog, I made a fake knot to fill the hole, and then fixed that in place.  The first step was to cut a small piece of timber from the same plank.  I also removed the loose bark and other material from the hole – note that I didn’t shape the hole in any way – to keep it looking natural.

Cutting the blank

I placed the blank over the hole and roughly marked the shape (oversize!) with a pencil.  Then using a saw, wood file and bastard file the blank was shaped to fit the hole.  The process involved cutting/filing a bit, returning to the hole and marking more pencil, then returning to the vice for more cutting and filing.  Eventually the new fake knot was almost the right size.

Almost the right size

After some final filing the knot fit perfectly into the space left by the loose knot – not too loose and not too tight.  The edges of the knot are not vertical – they are sloped at about 30 degrees so be careful to account for this if you are replicating this process.

Perfect fit

The fact that there is a little space around the edge of the knot doesn’t matter – it makes it look more authentically like a knot 🙂  The final step was to use wood coloured putty to fill all the gaps around it.  On hindsight I should have glued it in place first before using the putty, but I’m hoping the putty will be strong enough to keep the new fake knot in place!

This whole process took maybe 20 minutes.

More middle bit

After tear-out problems preparing the ceiling panels with the thicknesser, I changed the router blades. The difference is remarkable – the finish is now so smooth it almost doesn’t require sanding. I couldn’t be happier.

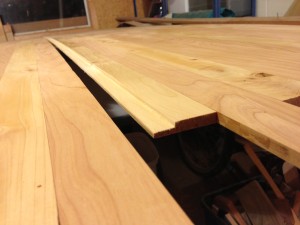
The three central sections of ceiling panel were run through the thicknesser and honed down to 8mm. I then used the table router to create a sort of shiplap of about 15mm width along the edge of the sections. This allows the sections to overlap when glued instead of simply butting up against each other and triples the area to be glued for a better hold.

The central section is now completely glued up ready for cutting to length and cutting the circular holes for the spotlights.

panel1


photo showing the routed overlap. The boards are 8mm thick, the overlap is 4mm x 15mm.

The middle bit

I planned for the ceiling to be carbonised bamboo. This requires 3 sheets of bamboo, with some sort of join between each sheet. After a rethink I’ve decided to split the ceiling and add a central section of Lawson Cypress. The plan is for it to provide some contrast (it is light whereas the bamboo is darker) and tie in nicely with the kitchenette. This way I only need two sheets of the bamboo – one either side of the Lawson – and no panel joiners.

The section of Lawson will be around 700mm x 2000mm. To ensure that it doesn’t end up weighing too much, I am using very thin timber – the finished thickness will be around 8 or 9mm.

I started by selecting a few nice straight 2m lengths of Lawson ex. 100×50, finished. I cut 12mm slices on the table saw off the thinner edge for a size of 44mm x 12mm. I then ran these through my new (second-hand) thicknesser to get them down to 10mm. I was not impressed by the tearout – almost every piece has some tearout damage. I presume its due to the soft wood, but I haven’t checked the blades yet. They may require some honing.

I then glued the finished pieces side by side in three sections around 240mm wide each.

The next step will be to glue the three sections together and finally sand the entire surface to get a nice, smooth finish (hopefully getting rid of all that tearout) and bringing out the grain. I fear there will be a lot of sanding ahead…

Preparing the lid

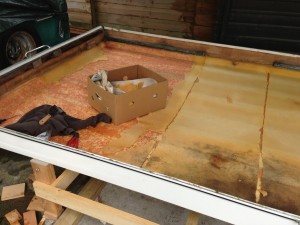
Once the roof of the caravan (after being removed) was all squared up on the jig, the next part was to prepare the roof before any future work can commence.  The old covering was pulled off, and the foam insulation was removed using a paint scraper.  It was going mouldy in places, and also covered areas that need access to the fibreglass later, so it had to go.  The glue holding the foam to the roof did not lift with the foam, so this will be removed with acetone later.

The fittings, which were very worn, buckled and oxidised, were also removed.  Some needed a spray with CRC to get them moving – but first I carefully measured and recorded their original location so that the replacements will be mounted in the same place!

Total time around 2hrs for this part (so far) without removing the old glue.

lid2

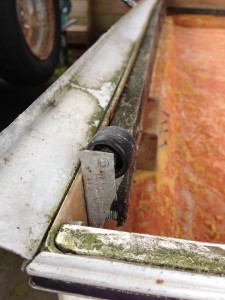
Detail of one of the fittings

Removing old insulation in progress

Removing old insulation (in progress).  The water damage and rot is apparent here.

Taking stock

After spending an hour or so taking key measurements of the inside and outside of the caravan and sketching the dimensions out, the next step was to take the roof off and take stock of damage.

The roof has rails along the inside of it’s length on both sides.  The two end walls have runner wheels attached that move inside the rails.  Removing the roof was a case of removing some rubber stoppers from the ends of the rail and letting the roof slide right off the end walls.  Covering the caravan with a tarp is critical at this stage, as it is open to the elements.

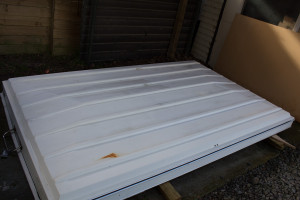
The roof removed from the caravan

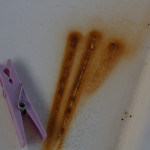
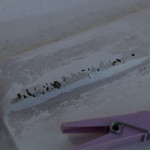
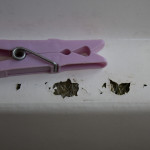
It then took me a good hour to clean enough of the accumulated grit off the fiberglass (mostly moss and algae) before I could see the sort of shape that the fiberglass was in.  The outer (gelcoat) surface has many small areas of mostly cosmetic damage, but nothing that I can tell that really needs structural repair (see the photos below).  Because of that i’ll be leaving the repair until the final stages of this renovation. as I don’t want to re-damage the gelcoat after putting hours into restoring it!

Rust stain Paint-over botch repair Holes through the gelcoat Nasty botched repair Algae damage Damaged rubber washers

The next step will be making a jig to support the roof as I work on it. Most of the time the roof will need to be upside-down, and without some sort of jig the fiberglass could very easily be structurally damaged.

The plan

Here is the plan for renovating the 1979 Liteweight poptop caravan:

Happening now

(i.e. Wife has approved)

  • Replace the peeling wallpaper ceiling with carbonised bamboo ply.
  • Install 12V recessed lighting (MR11), 230v driver circuit and wireless switches.
  • Attach small 12v winch and hidden pulley system to automate raising/lowering the poptop.
  • Add railing to one of the pop-out beds for 1yr old baby.

Happening soon

(i.e. Wife is thinking about it)

  • Replace hanging cabinetry with bespoke bamboo cabinetry.
  • Add LED strip lighting for reading lights and kitchen illumination.
  • Thicker foam squabs with new coverings.
  • New window coverings to match squabs.

May be happening (or not)

(i.e. Wide doesn’t know yet)

  • Replace damaged linoleum floor with something stylish.
  • Replace convertible seating/bed with permanent double.
  • Add fold-out table to other end of caravan.
  • New kitchen.
  • Re-paint interior.
  • Re-paint exterior.

Opera camper

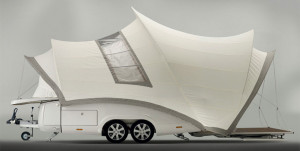
The Opera camper has got to be my favourite folding caravan design EVER.  Sad to see it’s no longer in production.  Poor timing with the GFC.

Keeping score

Maybe for the first time on any project, I’ll be keeping an up-to-date record of effort and costs 🙂

DescriptionPrep/planning timeBuilding timeCost (NZD)
Measuring and sketching all critical dimensions of interior and exterior before any work begins.1.5hrs
Purchasing trailer tarp and eyelet kit. Sewing corners into a fitted weather cover, and adding eyelets.2hrs$60.00
Removing roof and washing roof.1.5hrs
Shopping online and at local retailers for all the required parts5hrs
Purchase: 2x bamboo ply panels (1220 x 2440) from Three Brothers Building Center (Auckland)$138.00
Purchase: 24x 3W MR11 LED bulbs from AliExpress$67.62
Purchase: 4x 12v 1A LED drivers from AliExpress$31.48
Purchase: 12x MR11 downlight mounts from AliExpress$114.24
Purchase: 5m LED strip lighting from AliExpress$11.70
Purchase: 5m aluminium LED rail from AliExpress$76.16
Purchase: 4-gang wireless light switches (x2) and wireless control unit from AliExpress$119.00
Purchase: 12v batteries for lighting remote control$8.99
Purchase: 2x 5mm jack and plug from AliExpress$13.57
Purchase: Buttons for LED strip circuits$33.88
Purchase: Assorted electronic components (terminal blocks, wire etc)$4.40
Purchase: 12V 2000lb winch from savebarn (via TradeMe)$119.00
Purchase:Glue, gloves, cutting disc, sanding discs $55.44
Purchase: Fiberglass supplies (Acetone)$15.00
Purchase: Wire sanding brushes, builders bog$?
Purchase: Hardware for winch system$75.46
Purchase: Storage baskets for shelves$119.94
Purchase: Aluminium angle, box and bar for shelves and roof reinforcing$173.00
Remove old insulation and fittings from roof6hrs
Cutting, preparing and gluing central ceiling section 5hrs
Cutting bamboo panels1hr
Making shelves3hrs
Cutting holes for downlights1hr
Varnishing ceiling0.5hrs
Totals so far26.5hrs$1236.88


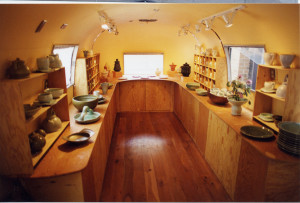
Just a cool caravan interior for motivation!

Airstream interior

Image source.

Brains up top

Its getting hotter and drier – or more accurately, less cold and slightly less damp – and I’m starting to eye up the caravan parked up in the corner of the back yard.

We purchased the caravan before the last holiday season and used it over Christmas without doing any work on it before deciding what needed changing.  We actually made up our minds, after several outings, that the fold-up/down feature of the caravan was unsuited to camping with 2 children under 3 years old.  We planned to sell it and then buy a more standard (but still ‘loved’ – read: in need of project) type of caravan that didn’t need to be set up.  However, after taking stock of finances and the hefty price of a decent caravan, we’ve decided to try again for another season.

A few repairs are required to get the caravan ready for this summer, but I’m not going to go overboard on renovations until we’ve given the caravan another trial run.  The roof of the caravan is a fiberglass cap, and the ceiling is a sort of heavy wallpaper that is glued up against the inside with a thin layer of insulating foam between.  This is starting to come away from the ceiling on one side of the caravan.

Of course – if I’m going to do a little work to the ceiling, I may as well do a few other bits and pieces to improve the caravan.  Instead of gluing it back up, I’ve decided to rip out the existing ceiling and redo it in stylish carbonised bamboo plywood with recessed ceiling lights and LED strip lighting – remote controlled, of course – and I’m going to install a winch and hidden cable/pulley system (with a remote control, of course) to automate the lowering and raising of the roof.

Because the caravan collapses and folds away like some sort of transformer robot, the roof is not connected to the walls.  One wall has the power point on the outside, and only that wall is wired for electricity.  The lights, power points and fridge are all along that same wall.  It would be almost impossible (or at least very expensive) to alter the electrics in the wall, so the best way to add features to the old girl is to add them into the ceiling.  The ceiling will contain several 12V LED drivers, wireless units for remote control, with (hopefully) hidden access hatch in case of maintenance.  A short lead will run from one of the existing wall lights to the ceiling to provide the 230v main power before stepping it down.  The ceiling will contain several 12v outputs to run LED strip lights below the kitchen cabinetry.

The main items have been priced up, and it looks like the total cost for this tech roof will be somewhere around $800NZD ($600 USD / £400 GBP / €475EUR).  I’ll be keeping a detailed spreadsheet, so it will be interesting to see how that develops.  In my estimation, this renovation should add over $1000NZD to resale value – even though that’s not the main concern here.

I have a lot more plans for the caravan, but one step at a time.  I’m getting excited – another project on the horizon!

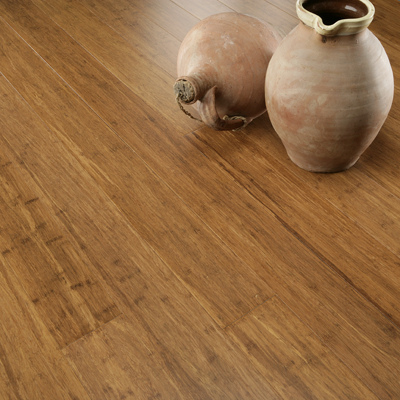
A beautiful example of carboinised bamboo (flooring, in this case). Image source

Renovating a vintage caravan

O.k., so 1979 may not be vintage, but it is almost as old as I am.  That makes it pretty old.

We’ve decided that a caravan is the ideal way to encourage us to get out more and see this beautiful land of ours.  I was also desperate for another project.  Wife, being her usual  commonsensical self, has suggested we use the caravan for a season before doing any work on it.  That way we can find out what we actually want to change on it before pulling out the power tools.  Bleh. Boring 🙂

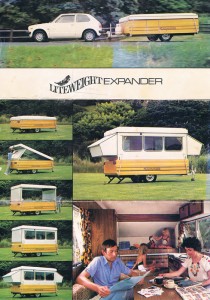
We selected a pop-up/pop-top trailer caravan because it is easier to tow, and easier to store at home.  There are some great canvas-sided caravans out there, but as soon as we saw this solid-sided model we had to have it.  This is a 1979 Liteweight Expander, originally produced by Liteweight Caravans in Hamilton, New Zealand.

Let the renovations begin!