I haven’t posted in a while – mostly because I’ve been busy on all my other projects – so here is a very quick update of progress with some pictures 🙂
First job was installing the roof. Carbonised bamboo on either side, with a panel of Lawson Cypress in the middle and remote-controlled 12v LED down lights.


After a few camping trips, Wife and I were ready for a better bed. We decided to put in a a permanent (almost) full-size double bed to replace the folding table and squabs. The mattress was made to order by a local bed manufacturer and is only 3cm shorter and the same width as a full double. We also removed the wardrobe to get extra room for the bed.
The bed folds upwards to allow access to all the storage room underneath.
The kitchen was removed because we never used it and we always cook in the awning. This allowed room for the bed, too, and I’m making new cabinets to fit the smaller space.


The next job were a few interior modifications. I added a shelf at one end for baskets (clothes etc) that folds up against the wall. We’re removing the wardrobe, so we need extra storage. Another shelf is planned for the other end, but hasn’t been done yet. Also added a side for one of the beds – our girl was only 1yr old at this stage and we didn’t want her falling out!


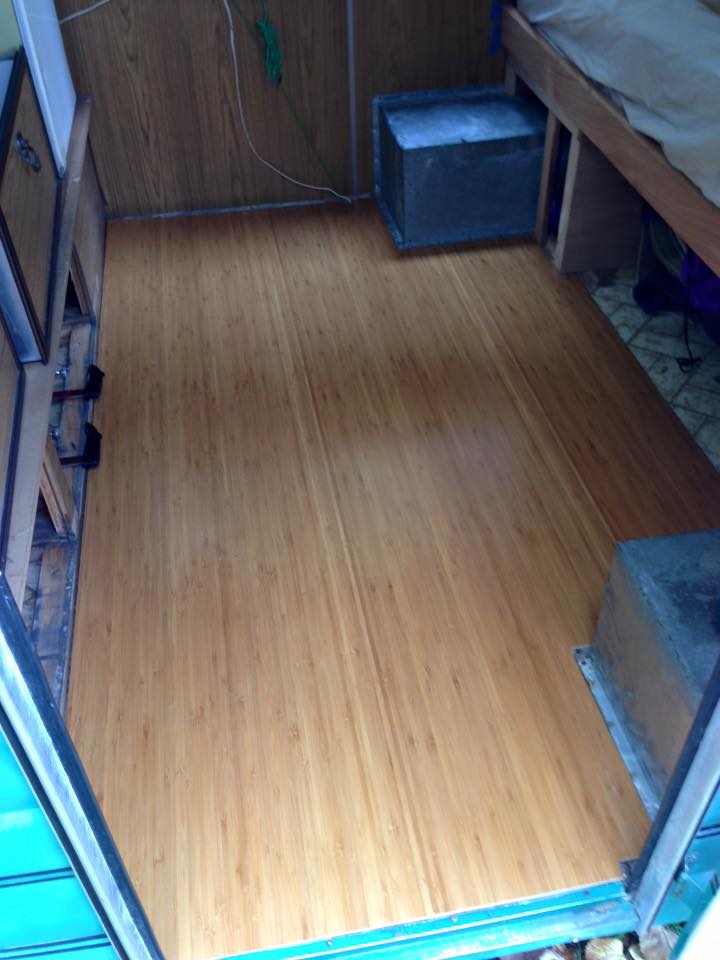
Next up was a new floor to match the ceiling. The old lino floor looked pretty horrible compared to the ceiling!


Currently I’m building the new cabinets to replace the kitchen that was removed (kept the fridge) and prepping the interior for painting!
This is starting to look awesome, do you have photos of the finished article? We are in the process of buying the same caravan and it needs some interior work????
Rhys
Hi Rhys, not yet! Still in progress. I’ve masked and painted one wall, and am slowly getting around to the others. If yours is like ours it’ll be a dark wood veneer inside, which closes the space up a bit. Does make it cozy though. I’m using some half-sisal left over from our house interior a few years back, and it has opened it right up in the caravan. Looks great. What I have noticed is that the paint goes on really well – no need for undercoat except on any metal bits you are painting. I’ve masked the aluminium panel joiners and hinge (not painting those). Will update with some more pics this weekend. Have fun with yours!
Hi, I have started a new group on facebook called Expanderable caravans.
Link: https://www.facebook.com/groups/expanderablecaravans/
Your thoughts and project pictures would greatly contribute to our group. If you wanted to join?
We decided to by an A frame caravan by Southern Star. A little smaller and a little lighter. But I still like the Liteweight expanders, they are a great design.
Kind regards, Brent Hunt
This renovation looks awesome! Have you finished it yet? Wondering if you are ready to sell…
Thanks Shelley! The work is pretty much done – just the trim to go around the edge of the floor. Unfortunately we need to use it later this year while our house is renovated, but maybe in time for next summer 🙂
Keen to know if you managed to get the 12V roof lifter working… Hardest job for me and other half is that first bit of the process when taking it out so could make things a whole lot easier! Thanks
Hi Jo – sorry for the extremely delayed reply! After getting new gas struts, it is just so much easier to open the top that I haven’t bothered with the winch. I’m working on a gantry for the garage and will probably use the winch for that instead! If your gas struts are still in good condition (mine were rusted right out) you might be able to refill them – otherwise you might need a replacement set.
Hi, we’ve also got an Expander. I’m keen to replicate your amazing storage shelf. How is it hinged? Appreciate any pointers as we aren’t DIY minded. How did your cabinets look in the end. Keen for photos of you still have any. Becky