My DIY ebike died a long time ago, and all attempts to fix it failed. While researching my next ebike I stumbled upon the interesting and thrilling world of Electric Unicycles (EUC). An EUC is a self-balancing one wheel personal electric vehicle (PEV) that you ride by standing on it and simply leaning in the direction that you want to go.
After some research, I purchased the Gotway/Begode MTen3. It’s the lightest and smallest wheel ever produced, but it fit all my criteria to a tee. To paraphrase my own review on roll.nz, I want a wheel to commute to work (about 3km each way) and carry up an elevator to my office. I want a wheel to ride to the gym and just shove in my bag and leave in the locker. I want a wheel that’s good in a city and can come on the odd shopping trip. This wheel does all that perfectly, and is just so fun to boot. Every ride leaves me with a smile.
I’ve now done over 170km (100mi) on my MTen3, and I love it. The only problem is, although it’s not that heavy, pushing it with a handle up the elevator and into the office would be much easier than carrying it. It doesn’t come with a handle. But I come with a shed full of tools and sheer determination 😀
Handle options?
Official ‘cable-tie’ trolley handle
There is actually an ‘official’ trolley handle kit that’s available for the MTen3 that can be purchased from wheel retailers, but also online from places like AliExpress. They go for around NZ$100 (US$65).
The problem is, part of the official solution is a cable tie to fix it to the carry handle. This isn’t a great solution, and it looks… well, lets just say I think I can do better.
3D printed cable-tie replacement
This cool 3D printed part by watchmaker_Ian uses the same trolley handle as above, but replaces the cable-tie with a custom 3D printed part. This is much nicer, but unfortunately the handle still looks a bit like an afterthought rather than part of the wheel.
Inmotion V8 handle mod
VasekPro designed this Inmotion V8 handle mod, including some custom 3D printed parts. This handle unfortunately requires some hefty modifications to the case which would seriously degrade the water resistance of the wheel.
Inmotion V5f handle mod
The Inmotion V5f handle is a slick, curved unit that suits the MTen3 pretty well. Some riders have tried to adapt it for the MTen3 with a bit of duct-tape, cable-ties or hose clamps.
After a bit of a think, I decided this was a good place to start for my own mod.
Improved Inmotion V5f handle mod for the MTen3
Here is what I ended up with:
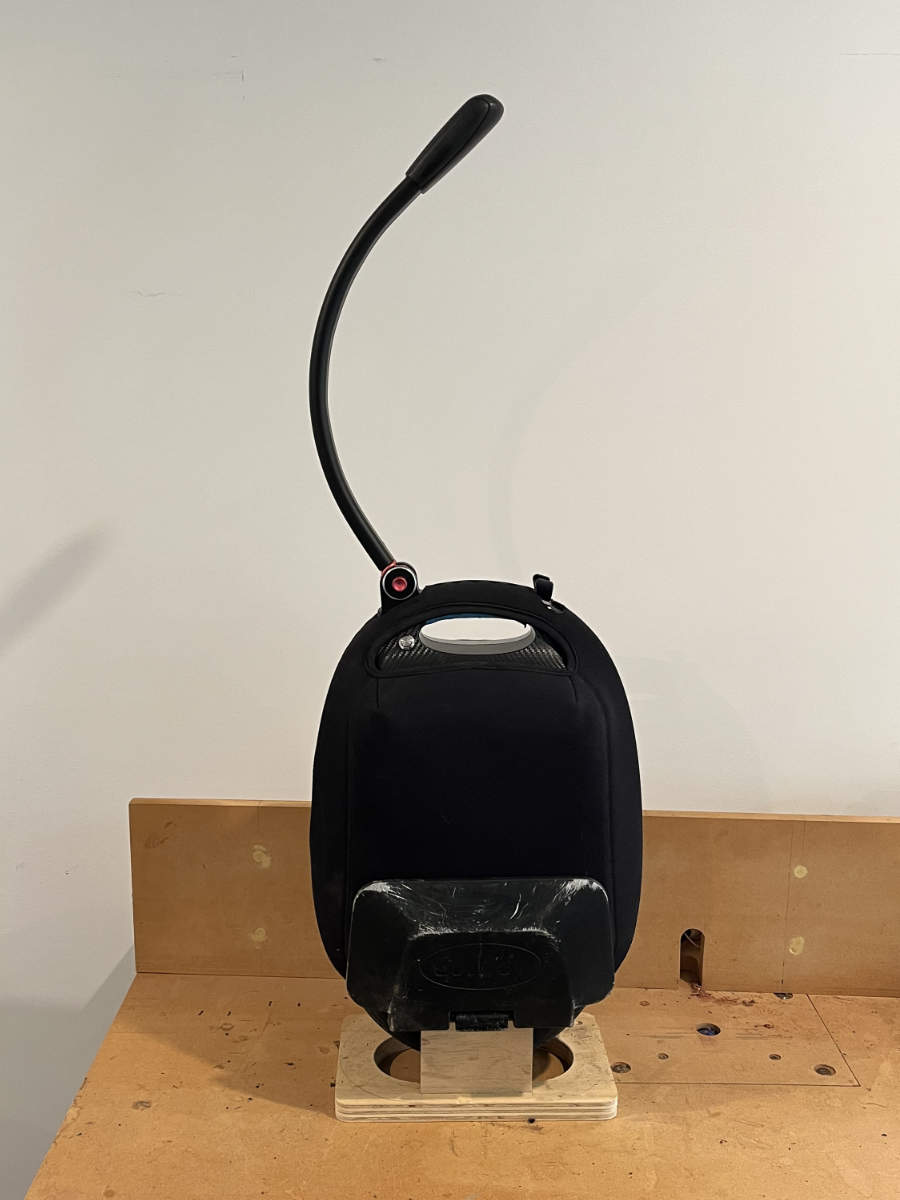

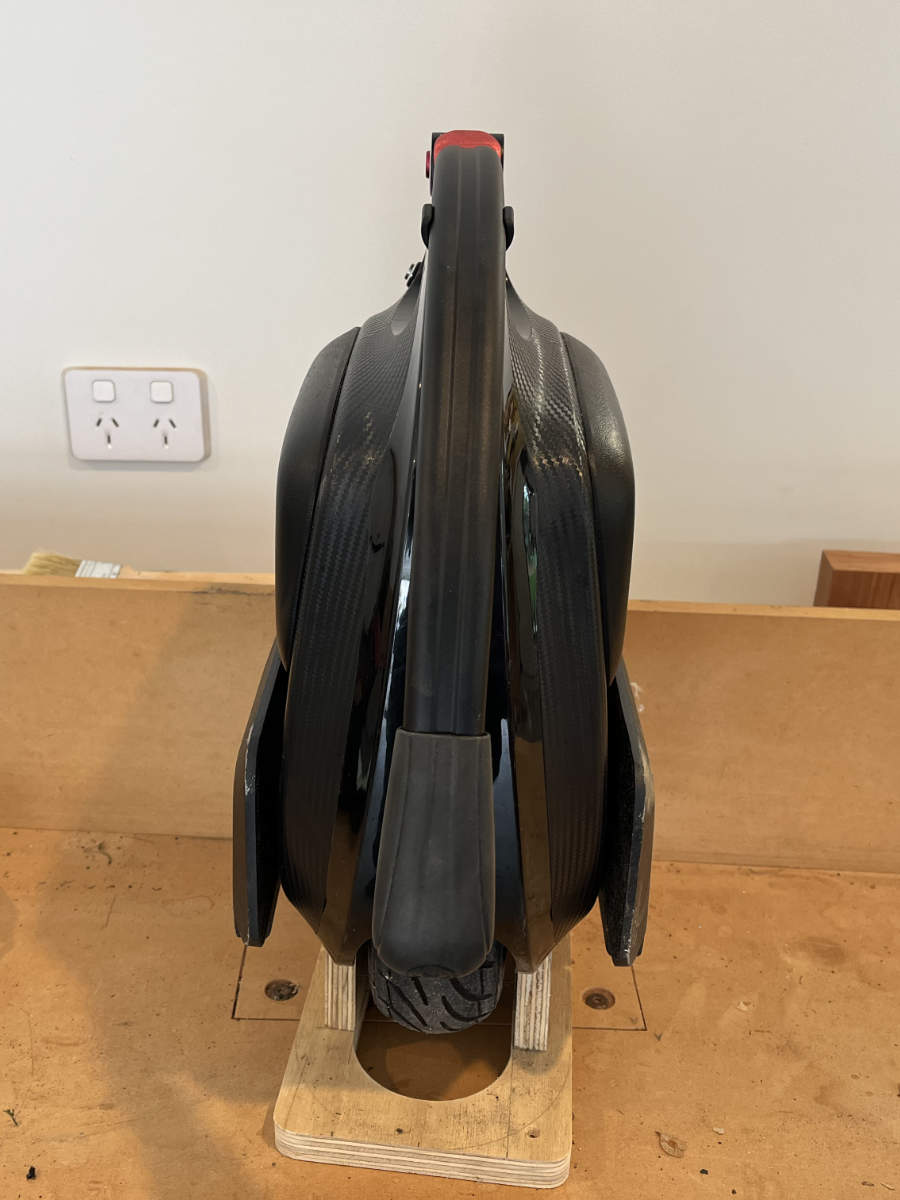


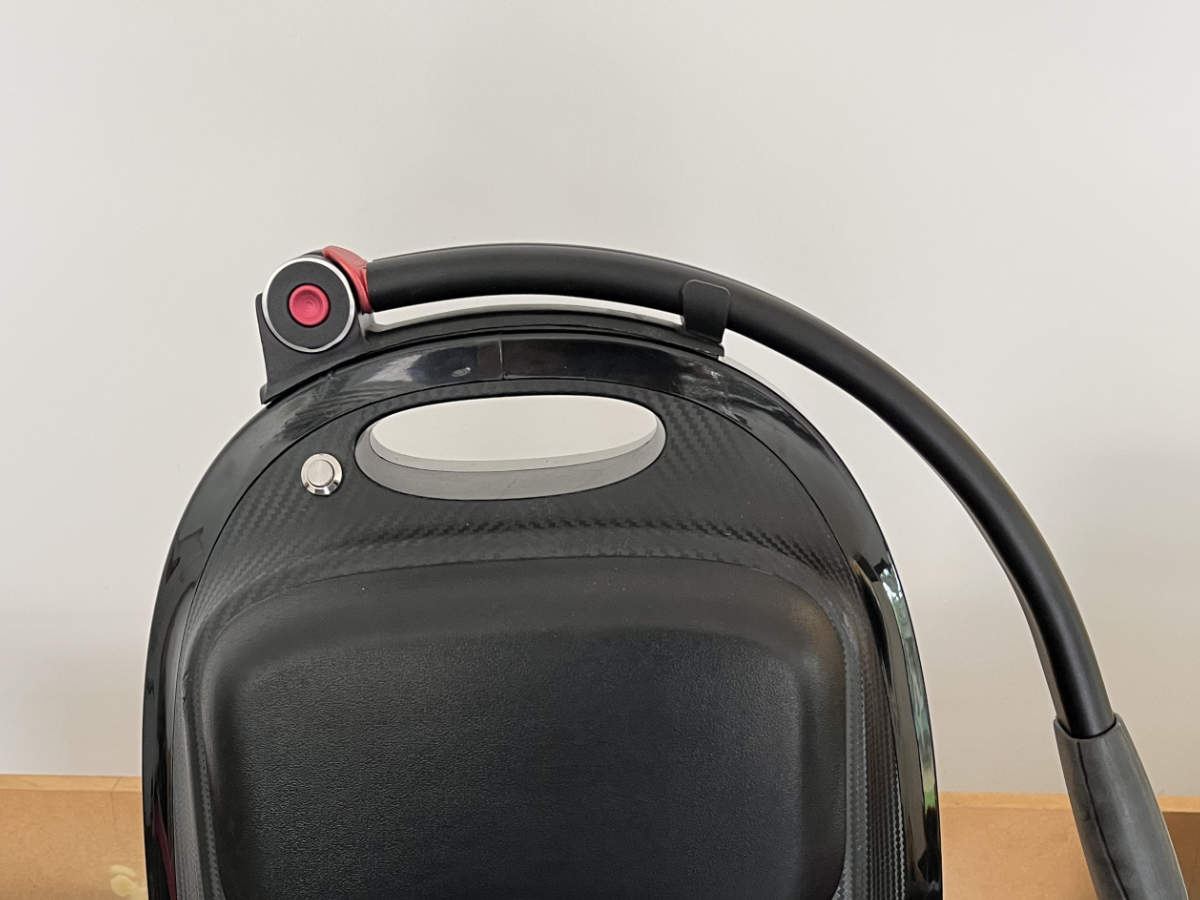
As you can see, it fits the MTen3 very well. It sticks out the back a little bit, but I plan to get the handle bent on a sharper angle at an engineering shop (I don’t have any rollers or other bending equipment).
Downsides
There are a couple of downside of this mod:
- Most of the LEDs are obscured, leaving only those at the front
- It’s harder to reach the cut-off switch with the handle down, unless you have big hands! (you can open the handle and then carry it, though)
- The handle protrudes out the back a bit. I do intend to fix that later by re-bending the handle
Instructions for making the V5f handle mod
1. Purchase the V5f handle kit
I purchased an Inmotion V5f handle kit from AliExpress for about NZ$90 (US$60) including taxes and shipping. I was pleasantly surprised by the high quality of the parts. It even came with a hex key.
2. Dismantle the handle
Using the supplied hex key (or your own if your handle didn’t come with one) undo the single small screw under the handle mount, and take all the handle hinge pieces off. Also remove the two screw holding the clip in place, and take that off, too.
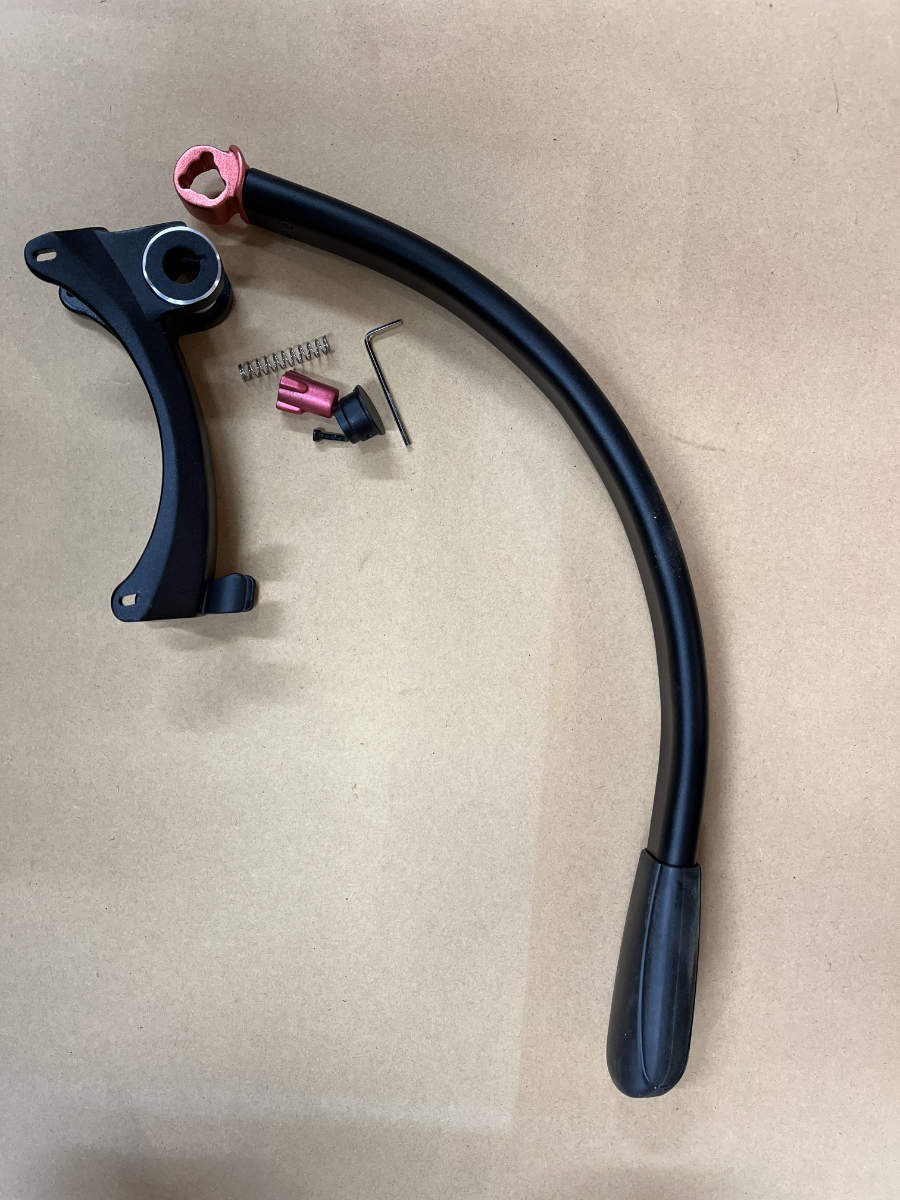
3. Cut the base to fit the MTen3 handle
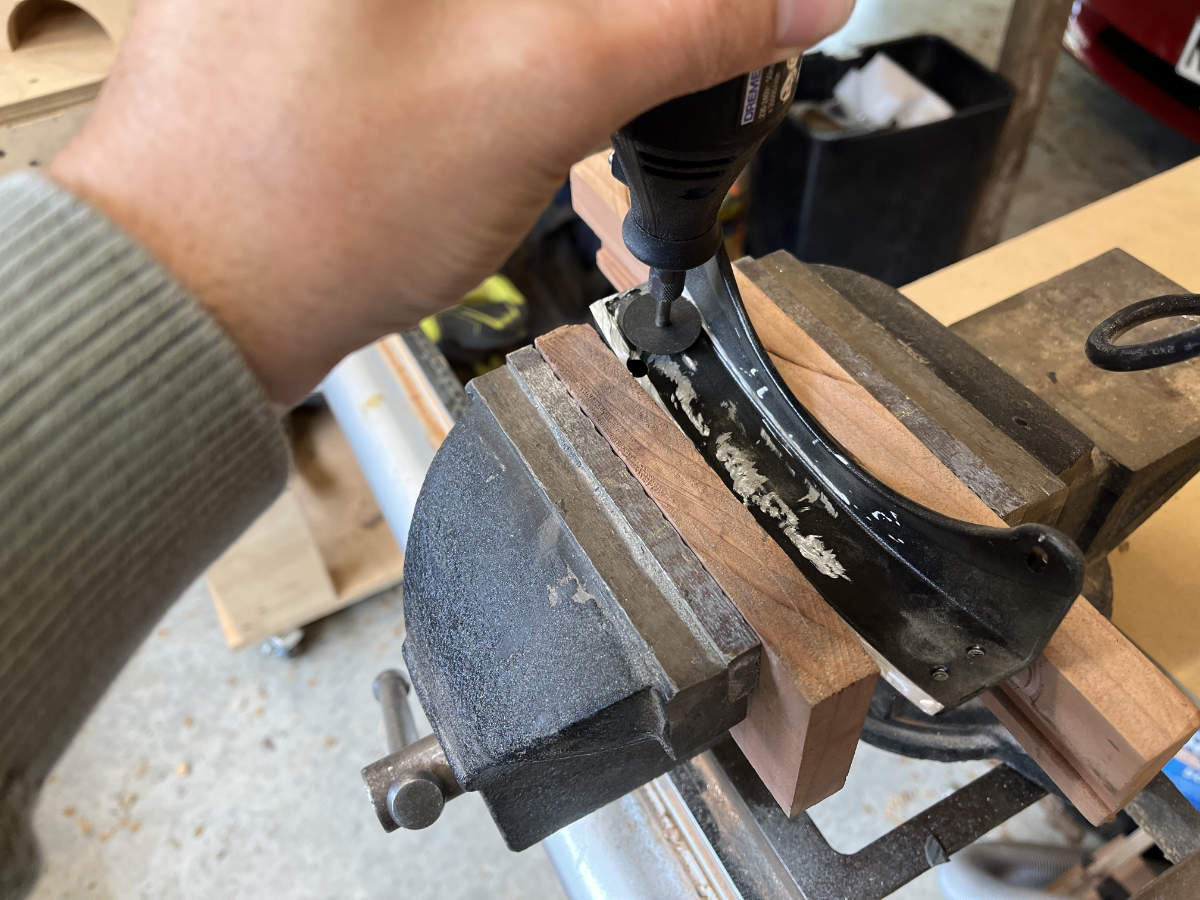
I have an angle grinder with cut-off wheels, but I thought that would be too course for this job. I used a Dremel tool with small cut-off wheels. Luckily I had a whole container of spare blades, because I used about 20 to get through this job.
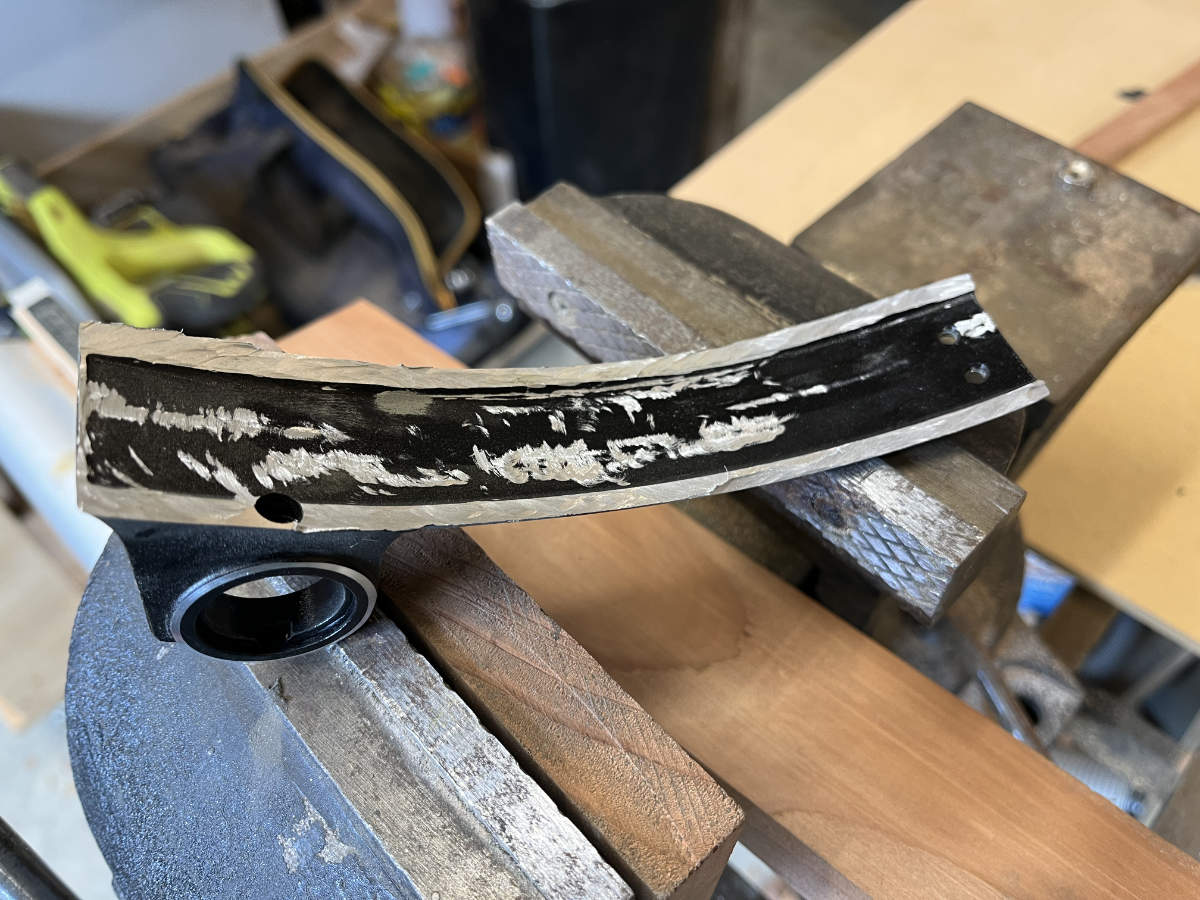
The aim is to cut off the two edges and end up with just the curved base, as flat as possible.
I mounted the base in the vice, using some wood offcuts to protect the aluminium. I cut off the edges, then used various files to remove more material, finally finishing off with a small grinding wheel on the Dremel to get a nice finish and to get rid of the sharp edges.
Update Jan 2023: Make sure you remove all of the edges and leave the handle base flat. Originally I left tiny (1mm) ledges (like you see in the photos), but these cause problems later on. File and grind until the ledges are completely gone!
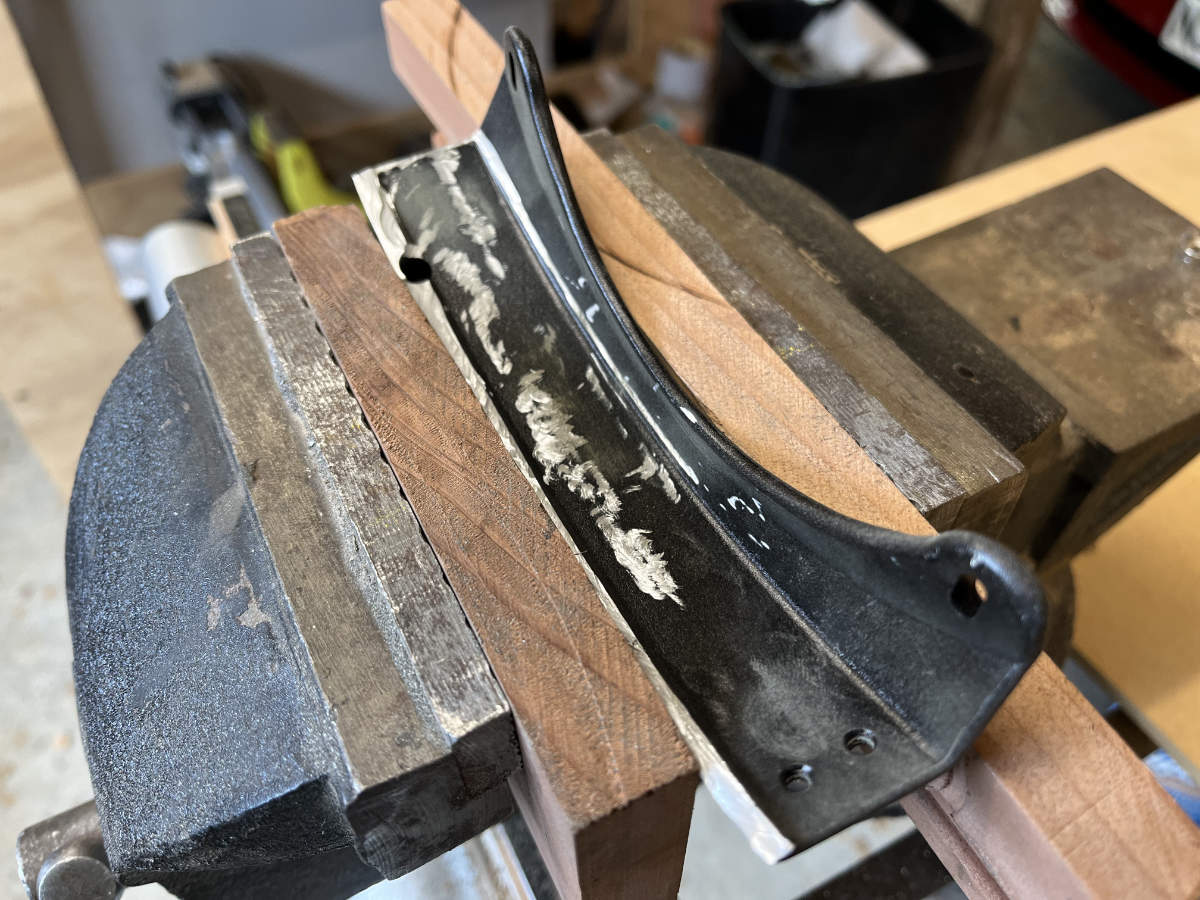



4. Test fit
Test fit the handle. You can see that the shape is very close to the MTen3 handle!
Update Jan 2023: Even though the fit is very close, it is not exact. To get a better fit, use a soft mallet and a small block of wood, and hammer the handle base a little flatter to fit the curve of the Mten3 more exactly. Hammer a little at a time and keep test fitting in between until you have it as close as you can get it. This means that the mounting tape will get a much better grip.


5. Repaint the base
After cutting the base it was pretty scratched up. Even though it wouldn’t be visible I had some paint handy, so decided to spray the base. I masked the handle mounting part and then used a couple of applications of Dulux Duramax Black Enamel in a semi-gloss.


6. Shorten the handle (optional)
As you can see, the handle protrudes about 80mm (3″) out from the back of the wheel. I will eventually re-bend the handle to fit more snuggly, but in the meantime I removed about 30mm (1 1/4″) of the start of the handle. You should just be able to remove the two small screws to take the handle off, but unfortunately mine were too tight and I had to drill and cut them out! With hindsight I would not have shortened the handle, knowing it would be so much work.
However in the end I shortened the handle, and it sits a little closer to the wheel.

7. Mount the handle
After considering alternatives like black hose clamps, I decided to just try double-sided tape to mount the handle. Not just any mounting tape, though, some Scotch extreme outdoor foam mounting tape with super-strong adhesive.
The benefit of the mounting tape is that it has a few mm of thickness (1/16″) which very nicely fills up the tiny gap between the V5f handle and the MTen3 handle. A quick clean to both surfaces with some white spirits first (allowing time to flash off), and then carefully apply the tape.
I was a little worried that it wouldn’t hold very well, but for the purposes of this handle it works a treat! I’ll try to remember to drop a comment in a couple of months to see how it is holding up.


8. Cut through-holes in the bodyguard
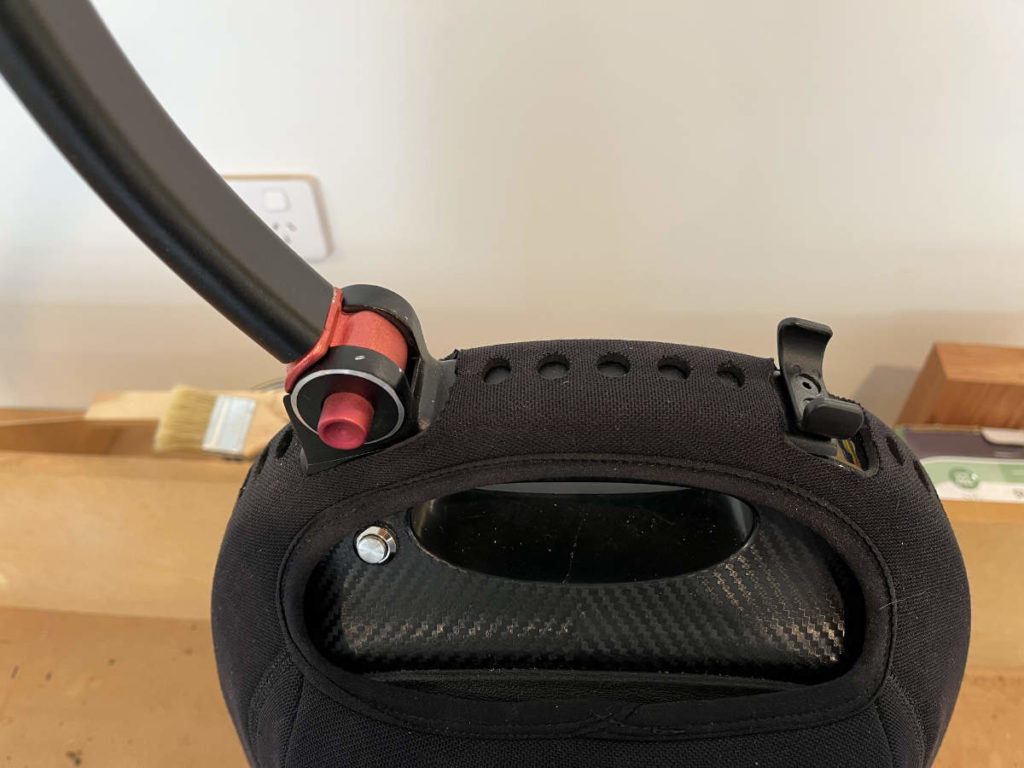
My MTen3 has a bodyguard from roll.nz. I absolutely recommend getting one, and if you don’t like black, you can get a fully custom one with colours and graphics to your design! I’ve dropped the wheel so many times while learning, and the bodyguard has kept the case pristine. The foot pedals are all scratched up, of course, but my plan is to get some nice studded honeycomb replacements once I’m over the learning phase.
I’m not super-happy with my modifications to the bodyguard. I cut one the hole for the clip a little large. However, I plan to order a new bodyguard with the holes machine-cut and already in the right spots!
That’s it
Aside from painting, this took me an afternoon all up. I still intend to re-bend the handle to better fit the shape of the MTen3, and I will report back on how the Scotch mounting tape holds up – though I am really impressed by rigidity of the handle.
Happy riding!
One-month update (Jan 2023)
The handle detached in a few days after a couple of spills (Mten3 doesn’t do well on off-road pine needle trails!). In the workshop I inspected closer and made some changes, and since then the handle has remained rock solid, even after many more falls.
- In step 3 (Cut the base to fit the Mten3 handle) you need to ensure that both of the edges are completely removed, and that you are left with a flat (well, curved but flat) surface underneath. My original handle still had tiny ledges (1mm high or so). I thought that these would be ok, but they caused a slight gap between the handle base and the Mten3, and the tape couldn’t get proper purchase.
- In step 4 (Test fit). take a small block of wood and a soft mallet, and slightly flatten the curve of the handle base to fit the MTen3 as closely as possible. Test fit the handle and see where the high spot is, then give it a few taps with a soft mallet using the wood block underneath. Repeat the process until the curve of the handle base exactly matches the Mten3.
- Now attach the handle to the MTen with the extreme mounting tape. It will provide a really solid hold.
This is a great work, thank you for sharing!
I’m curious about how much of the resulting weight of the wheel, and also the adhesion stability after Jan 2023 update.
BTW I use Araldite epoxy for this kind of bonding, it has pretty nice performance.
Thanks Mark – sorry for the very late response!
The adhesion has been perfect – the 3M outdoor tape seems to hold up really well. The handle has come of again twice after several spills, but I just replace the tape and it’s good to go again. Great idea about the Araldite. Now that I’ve verified that the handle works well I don’t mind making it permanent.
The weight of the handle mod is negligible compared to the overall wheel weight. I’d estimate 200g. But when it comes off next time (or I take it off to glue it) I’ll measure it properly.